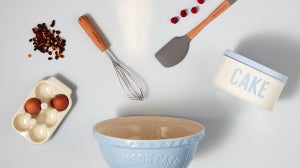

We decided to go all out for this week's recipe with a four tier Red Velvet cake with cream cheese and white chocolate frosting. We've just polished off the last of this in the office so we guarantee it will go down a storm with friends and family!.
So, let's get started...
Ingredients
For the cake...
250g of Butter, softened
600 g Caster Sugar
5 Eggs
2 Tablespoons of Red Food Colouring
3 Tablespoons of Cocoa Powder
375g of Plain Flour
2 Tablespoons of Greek Yoghurt
1 Teaspoon of Vanilla Extract
1 Teaspoon of Bicarbonate of Soda
For the frosting...
2 x 200g tubs of Cream Cheese
350g White Chocolate
250 g (one pack) of unsalted Butter
If you need to stock up on baking equipment, visit our baking department at The Hut

Method
For the Red Velvet cake...
Preheat your oven to 180 degrees or Gas Mark 4. Prepare two round tins (preferably the same size) with greaseproof paper. See the end of this post for an easy tip to get your greaseproof paper to fit perfectly without having to draw out the shape of the tin!

Cream together the softened butter and sugar in a large bowl until smooth. Then add the eggs one by one, mixing thoroughly in between each.

Add the food colouring to your mixture, then add the cocoa. Add the cocoa a little at a time, stirring in between, to make sure that you get the shade of red exactly how you want it. Some prefer a vibrant red cake where other prefer a darker shade.
Mix in the sieved flour, bicarbonate of soda and greek yoghurt, stir thoroughly to make sure everything is combined.

Divide the cake evenly between the two tins, smoothing the top with a spatula. Then bake in the preheated oven for around 25 minutes or until baked. To find out whether or not the cake is baked, simple insert a knife into the centre of the cake, if the knife comes out clean then it's baked.
Leave to cool on a wire rack, remove from the tins and prepare the cream cheese and white chocolate frosting.
For the Cream Cheese frosting...
Melt the white chocolate in a bowl over a pan of hot water, then allow to cool to lukewarm.
In a separate bowl, beat the cream cheese until light and fluffy.
Mix in the white chocolate and softened butter gradually then beat until it is the consistency of whipped cream and there are no lumps.
To build the Red Velvet cake...
Take the cooled cakes and slice horizontally through the middle so you have four identical, round, thin cakes. A bread knife works well for this as it's long enough to slice the whole cake.

Place the first layer of cake onto a plate or cake stand, then build up each layer. To do this, use a spatula or butter knife to add a layer of the frosting on top of the bottom layer of cake, then another layer of frosting, then another layer of cake until you have used all of the layers of cake. Leave the top layer without frosting for now.
To make sure you have a nice, flat top to your cake, make sure the last layer is the turned upside down to use the shape of the bottom of the cake tin. This will give you a smooth surface for your frosting and gives it a professional finish.

Once you have built your cake, add a thin layer of frosting over the entire cake. This is the crumb coat, which will stop any crumbs from the cake showing when you complete the final layer. It also means you can even out any lumps, bumps or gaps between layers to give it a professional finish.

Add the final, thick layer of frosting. A spatula or a warm butter knife work well for this. If you're looking for clean lines and a sharp edge, opt for the flat side of a butter knife and smooth all the way round the edge of the cake.

If you have any off cuts from the cake, you can use them as decoration! Simply crumble up any leftover cake you have and sprinkle on the top of the cake.
And voilà, there you have it, your very own four tier Red Velvet cake! You can also use this recipe to make Red Velvet cupcakes, just add the mixture to cupcake cases instead of cake tins and top with the cream cheese frosting.
We thought we'd share a handy tip for cutting a perfectly sized circle of greaseproof paper for your cake tin too.
Take a sheet of greaseproof paper just slightly larger than the widest part of your cake tin. Fold it in half, half again, then half again until you have a triangular shaped piece like the below.
Place the pointed edge approximately in the centre of your tin and cut the paper along the curved line of the cake tin.


Unfold your circle of paper, grease your cake tin and it should fit perfectly in the bottom!
If you have a go at making this yourself, send us a photo on twitter, we'd love to see it!


